We are very excited to bring you this amazing integration between UChat and Intercom as we believe this will bring the best of both worlds together to save you time and money while bringing the best possible experience for your customers.
Step 1. Integrate Intercom with UChat
Integrating with Intercom is very easy.
When you are on your UChat dashboard go to the integration section from the left-hand menu, then choose Intercom.
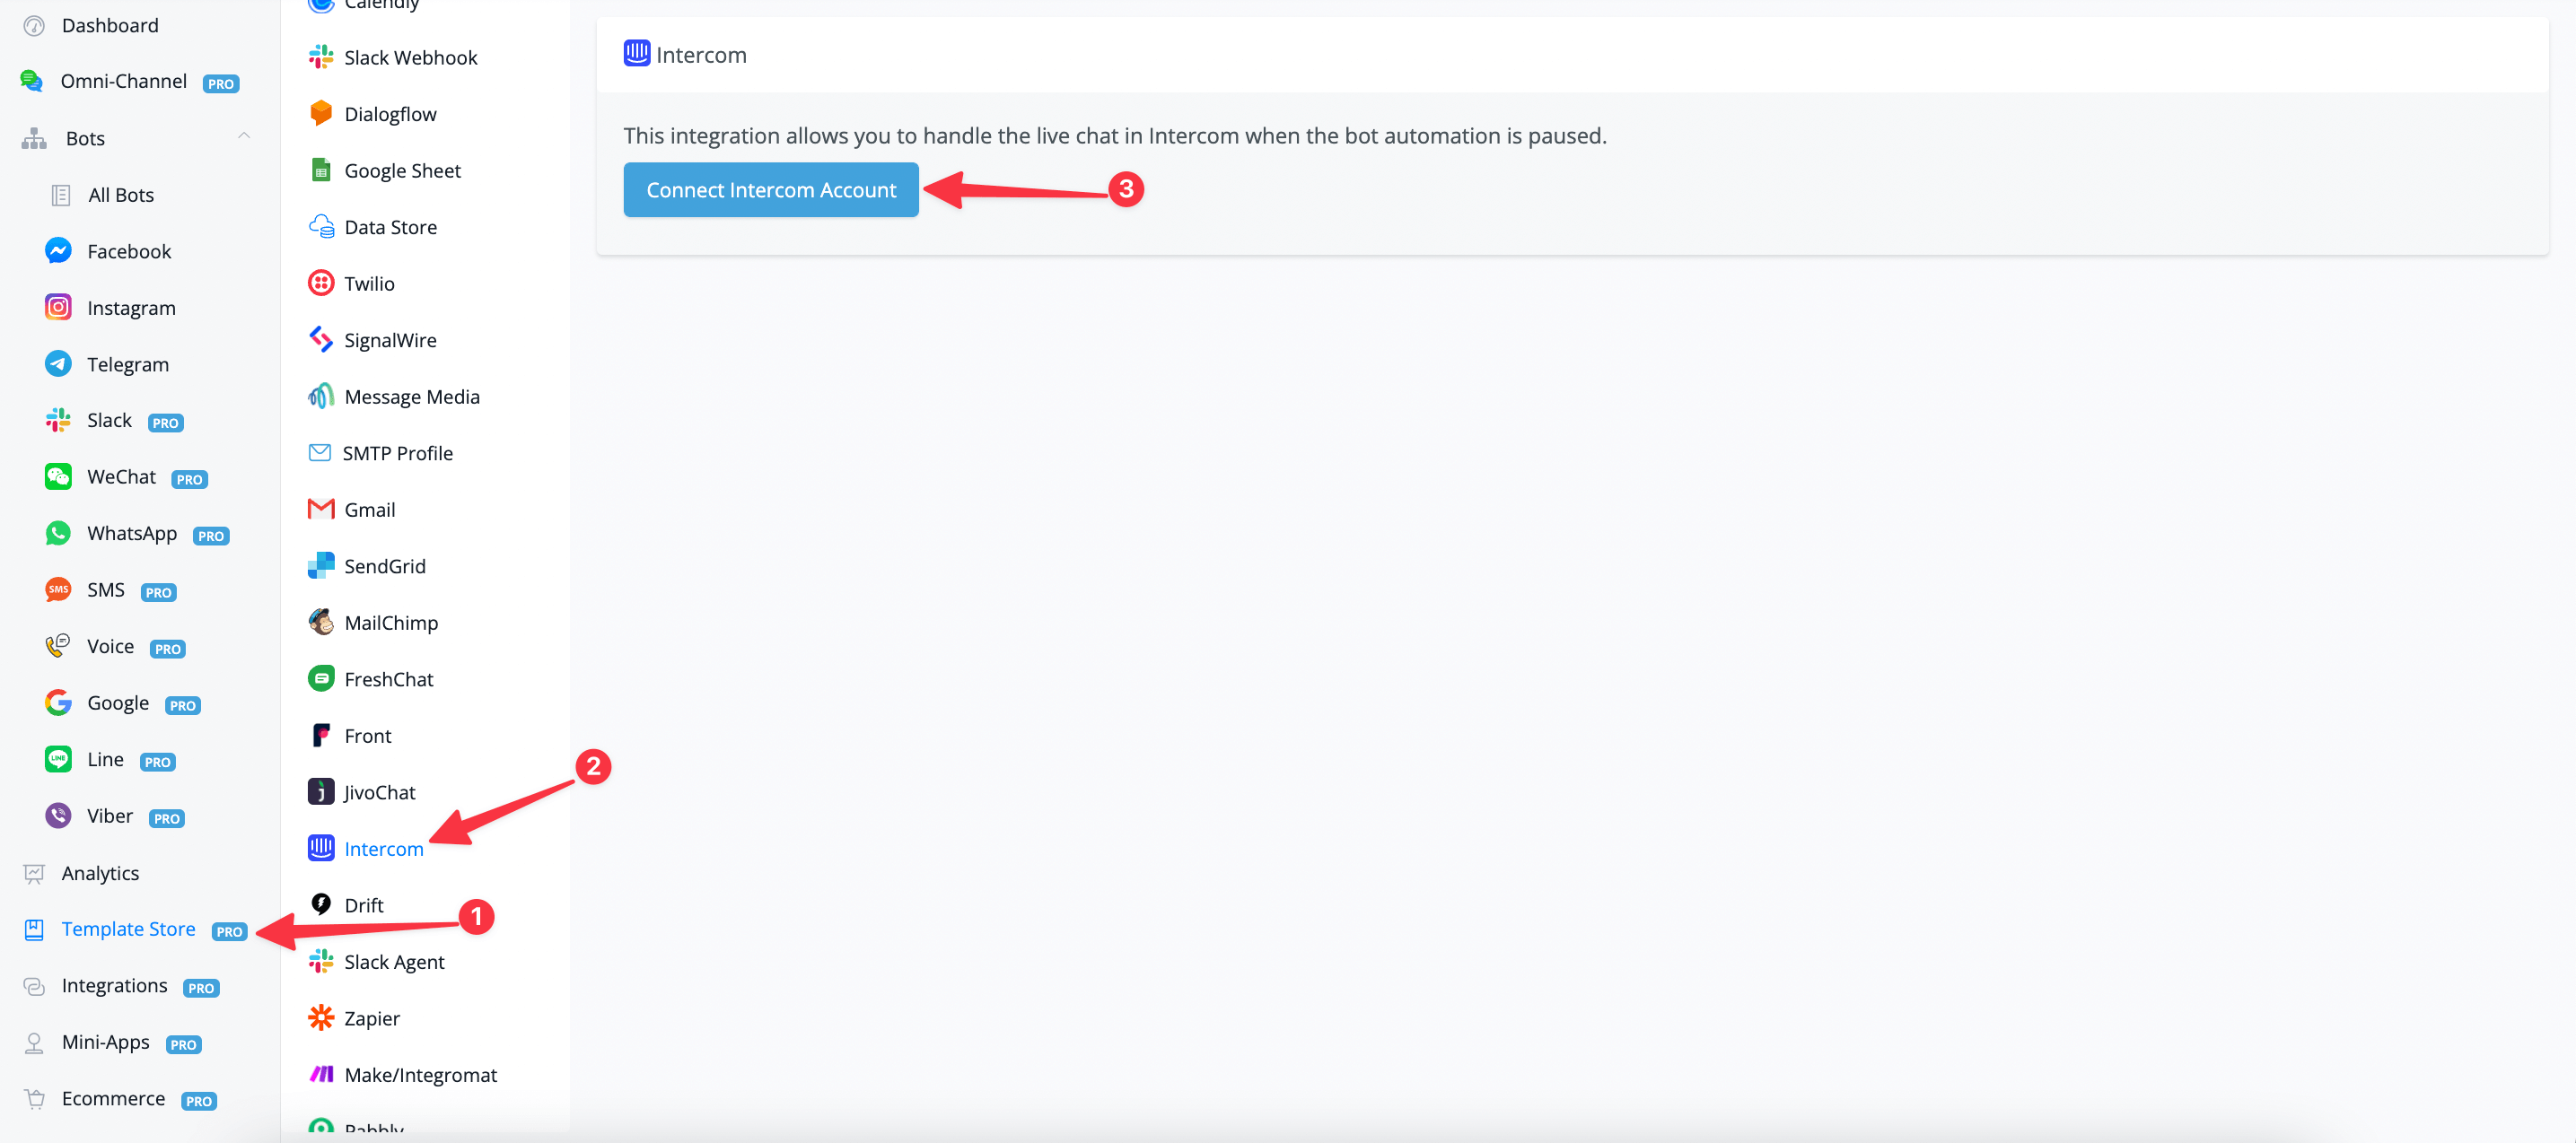
You will see a blue button named “Connect Intercom Account”
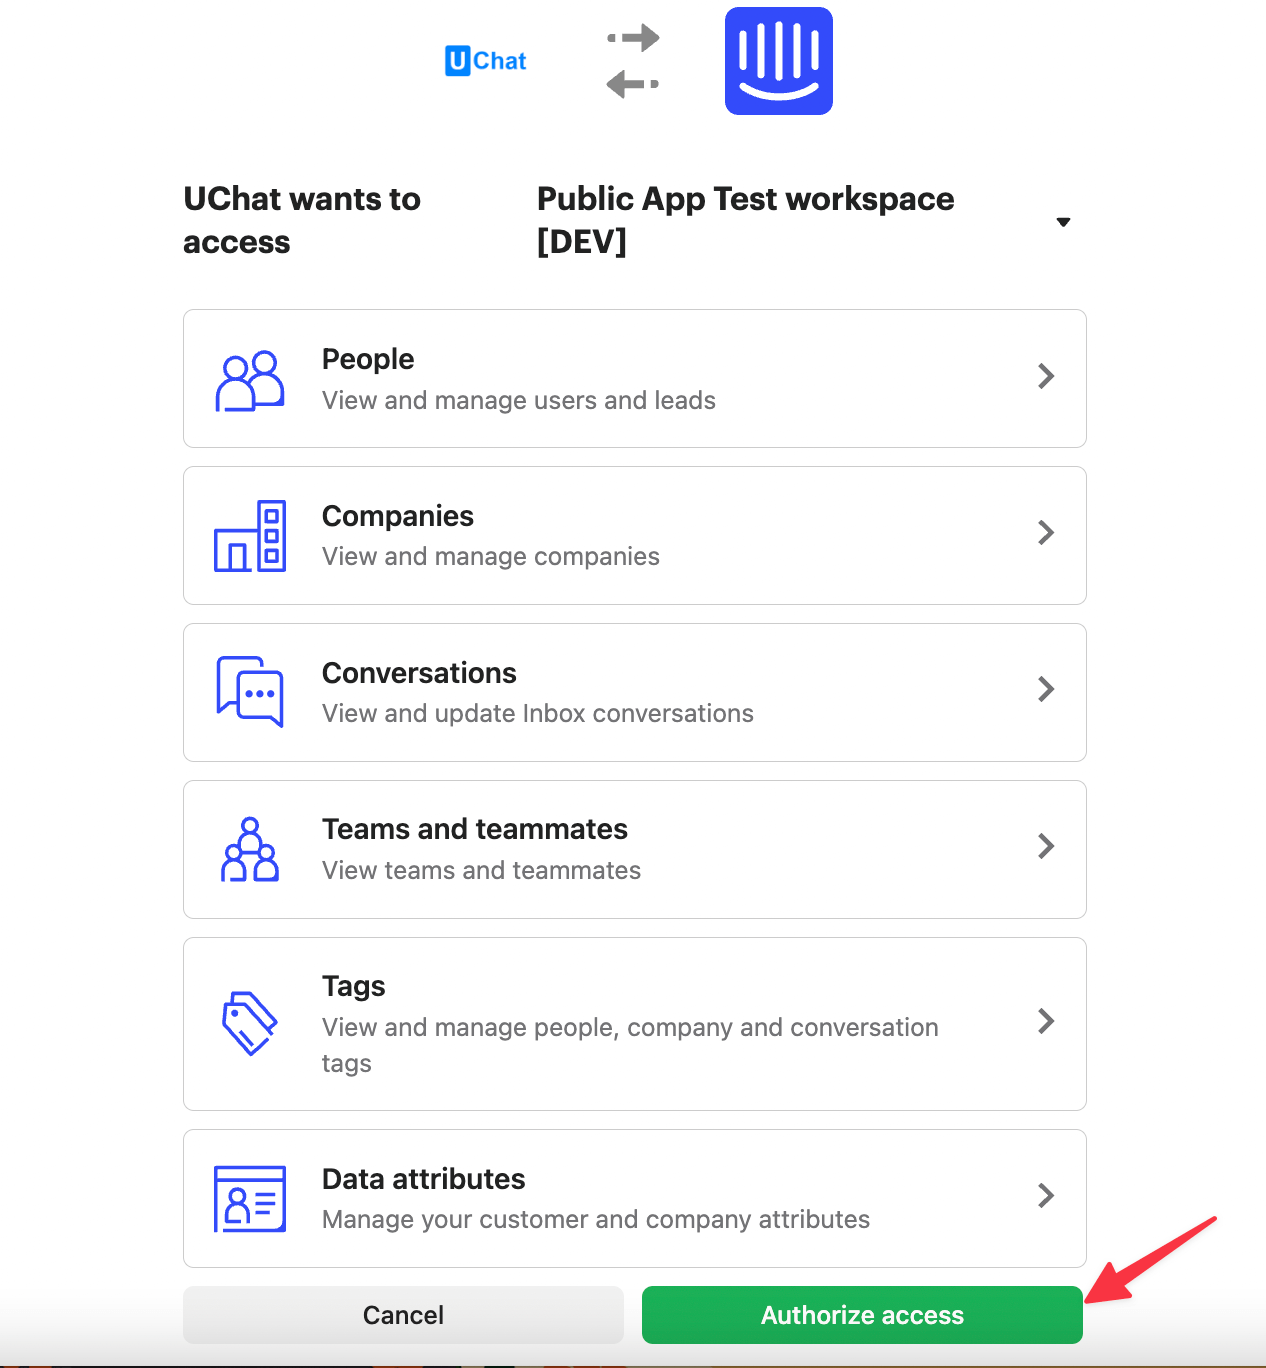
You will be taken to a new tab where you will be asked to Authorise Access for UChat to connect to your Workspace.
Press the button at the bottom named “Authorise Access”
You will then be taken back to UChat and your account has been connected showing your workspace inside the overview.
How to set Intercom as live chat agent
Now that the integration has been all set you are able to hand off any live chat over to Intercom very easily.
Login to any chatbot that you have and go to the settings overview. You can find this tab in the left-hand menu.
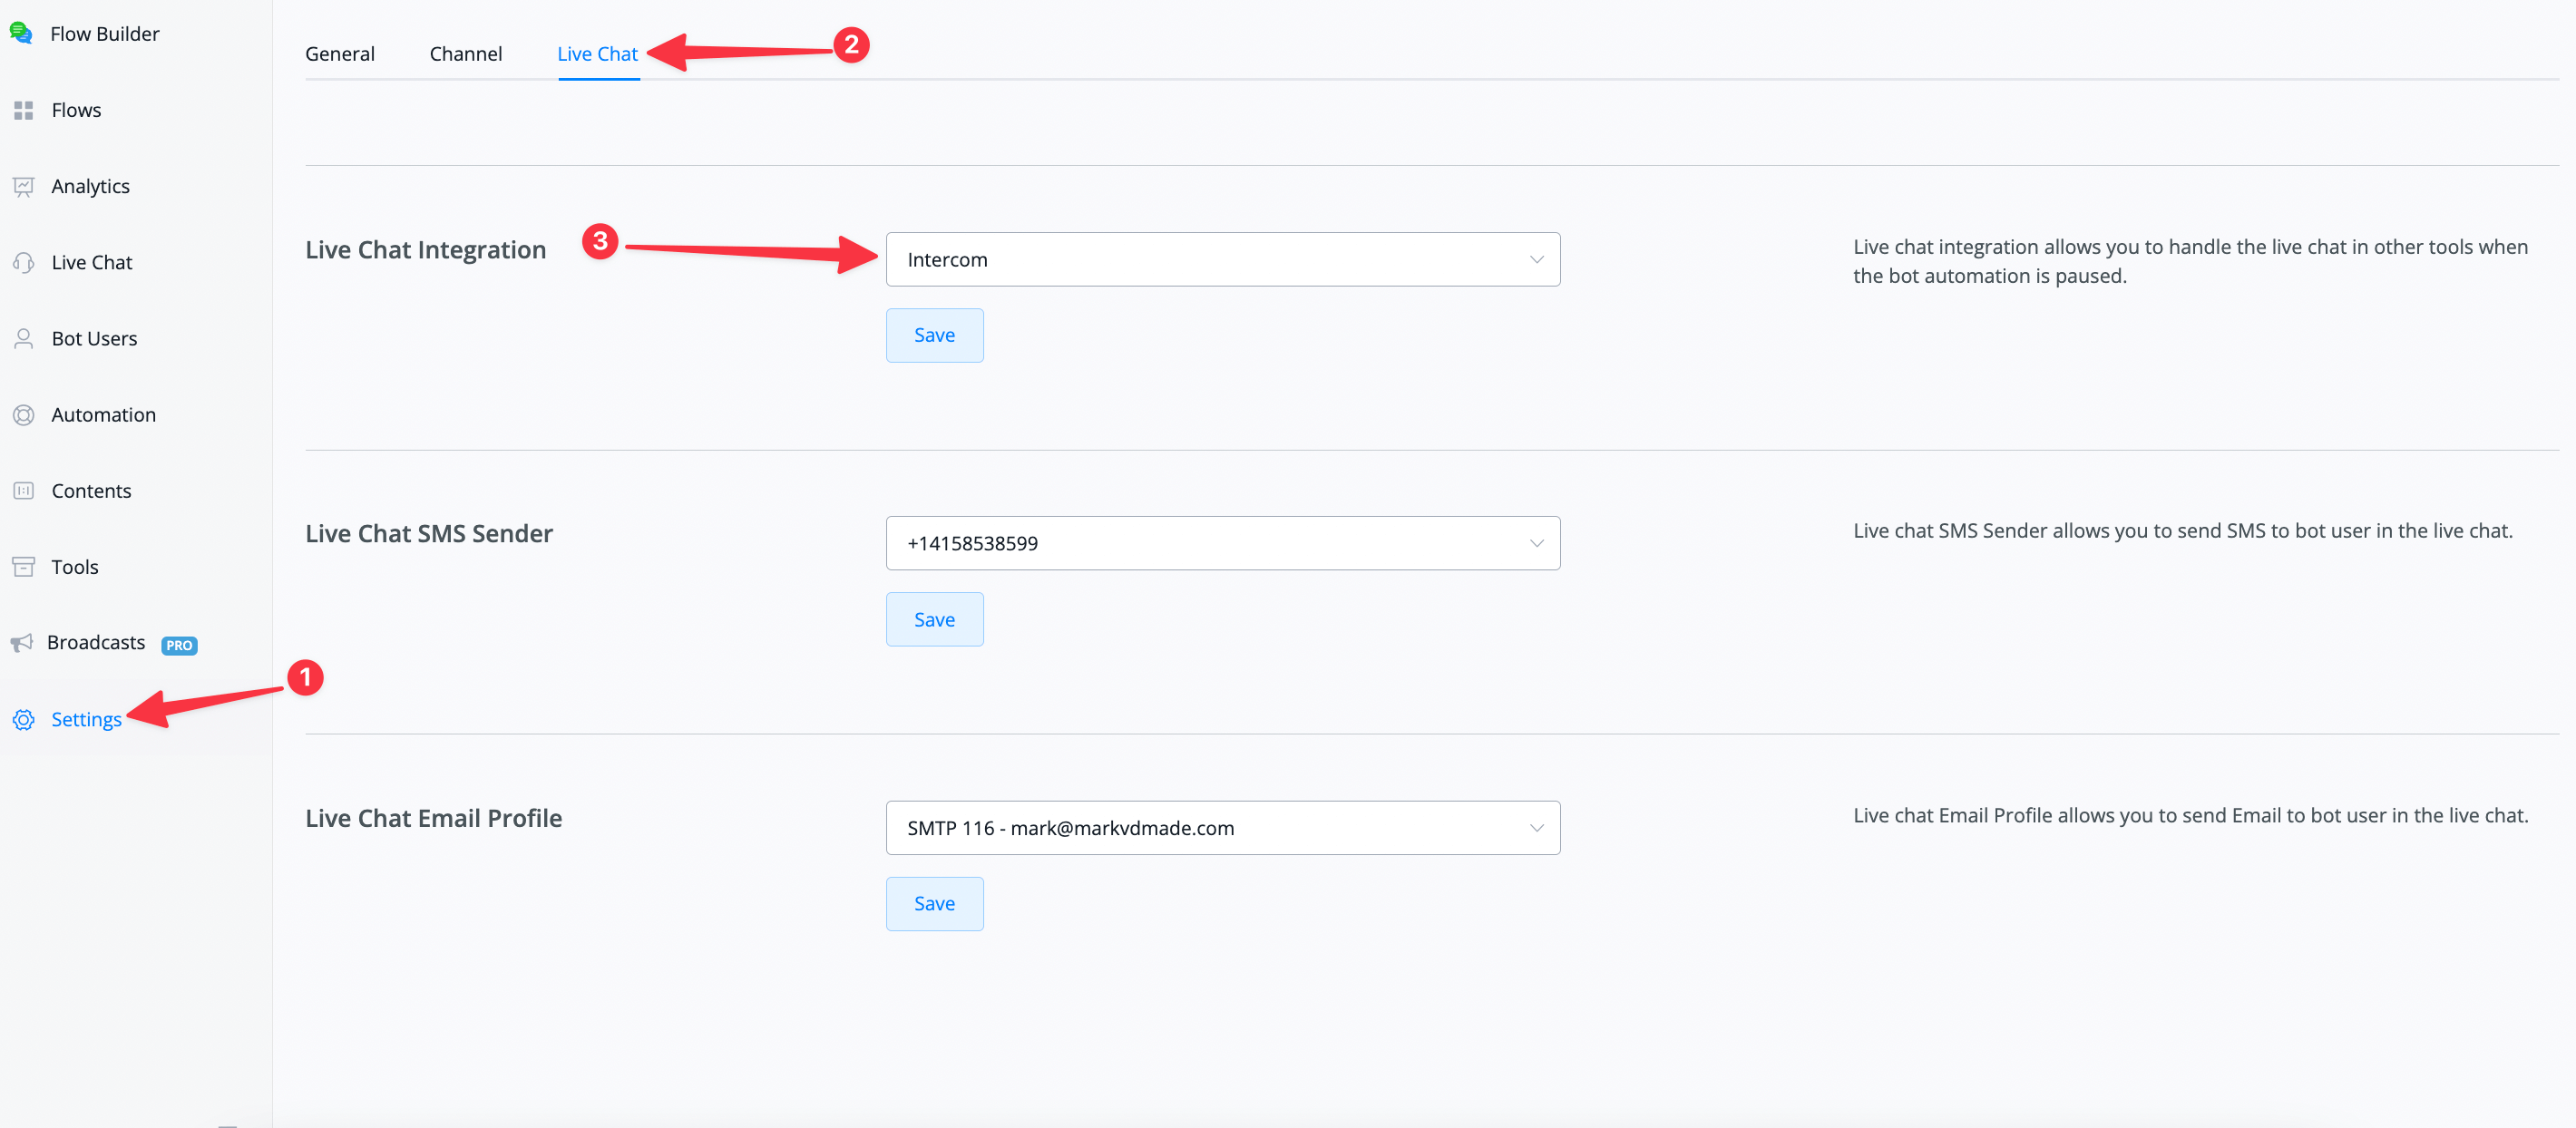
Select Intercom from the dropdown in step 3 of the image above and then press the save button below it.
Hand over the live chat to Intercom
Now it is time to handover the live chat to Intercom inside the flow builder. It is really easy to do.
Go into your customer support flow.
From here insert an action block after you asked the user to submit the question. That could look like the following;
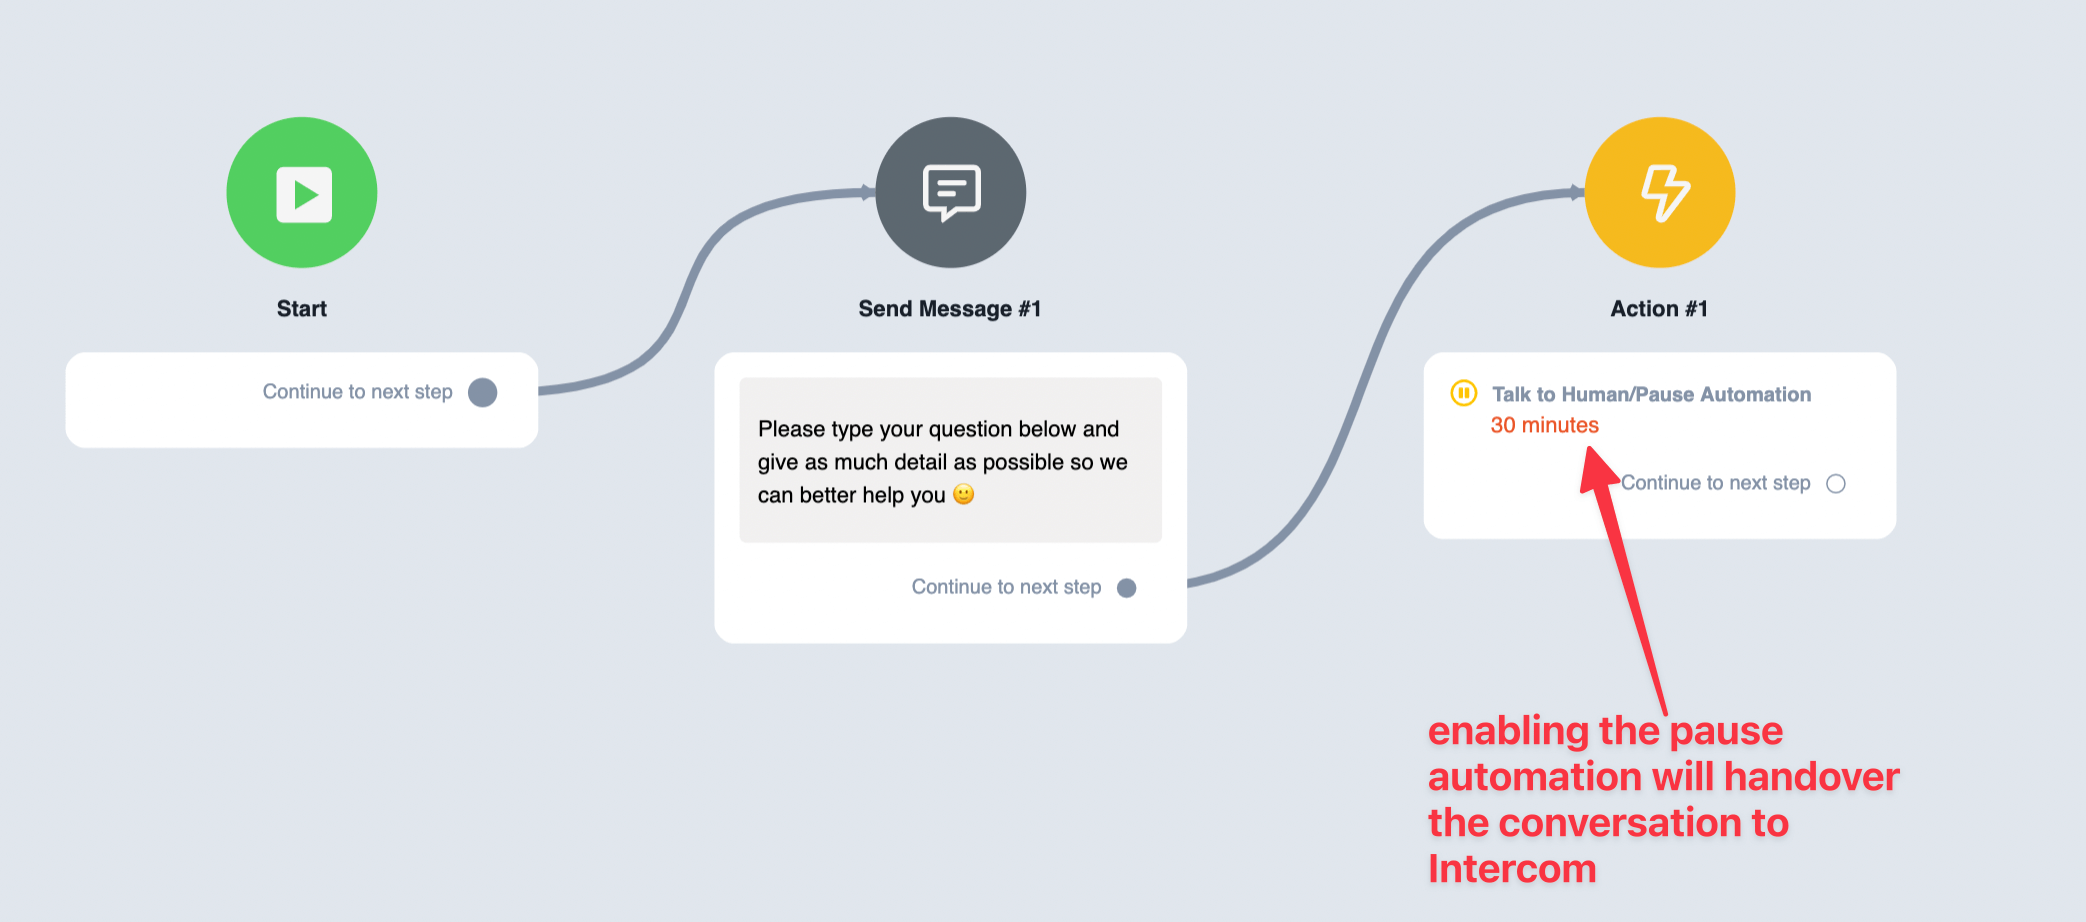
Soon as the user types in their question it will show up inside the Intercom inbox
Let’s take a look;

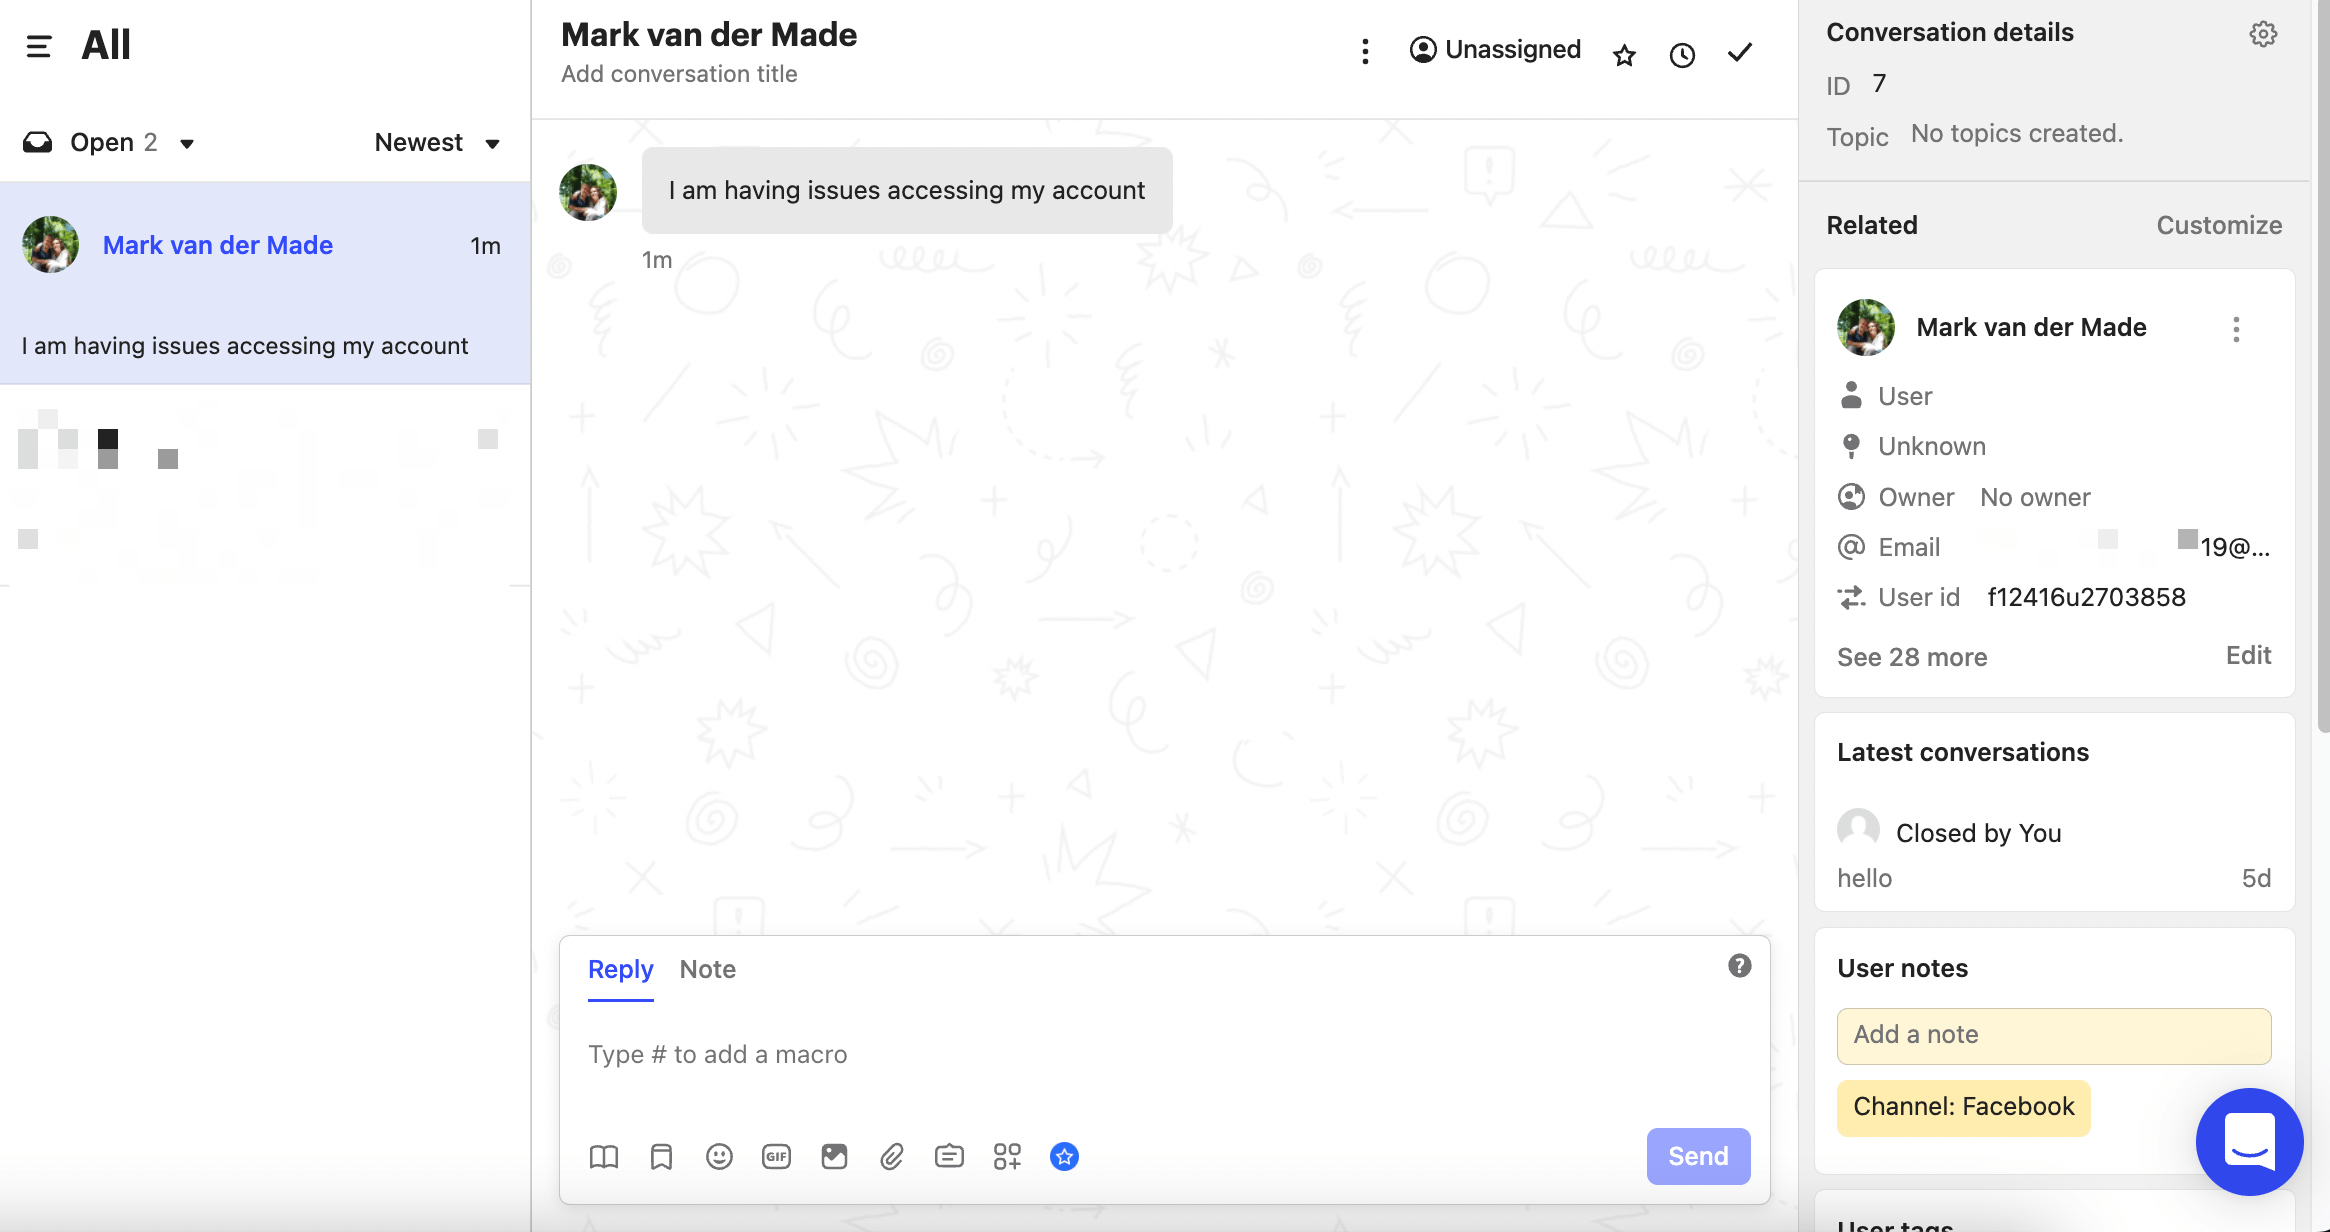
As you can see the user sends a question inside of Messenger in this case and the chatbot handed this conversation over to Intercom so any live chat agent can respond.
Notice also how the user information from UChat is being exported to Intercom. This gives the live chat agent all the necessary information to properly help the user with his issue. Notice also how the user information from UChat is being exported to Intercom. All information like name, email, user id and so much more.This gives the live chat agent all the necessary information to properly help the user with his issue.
How to respond to the user from Intercom
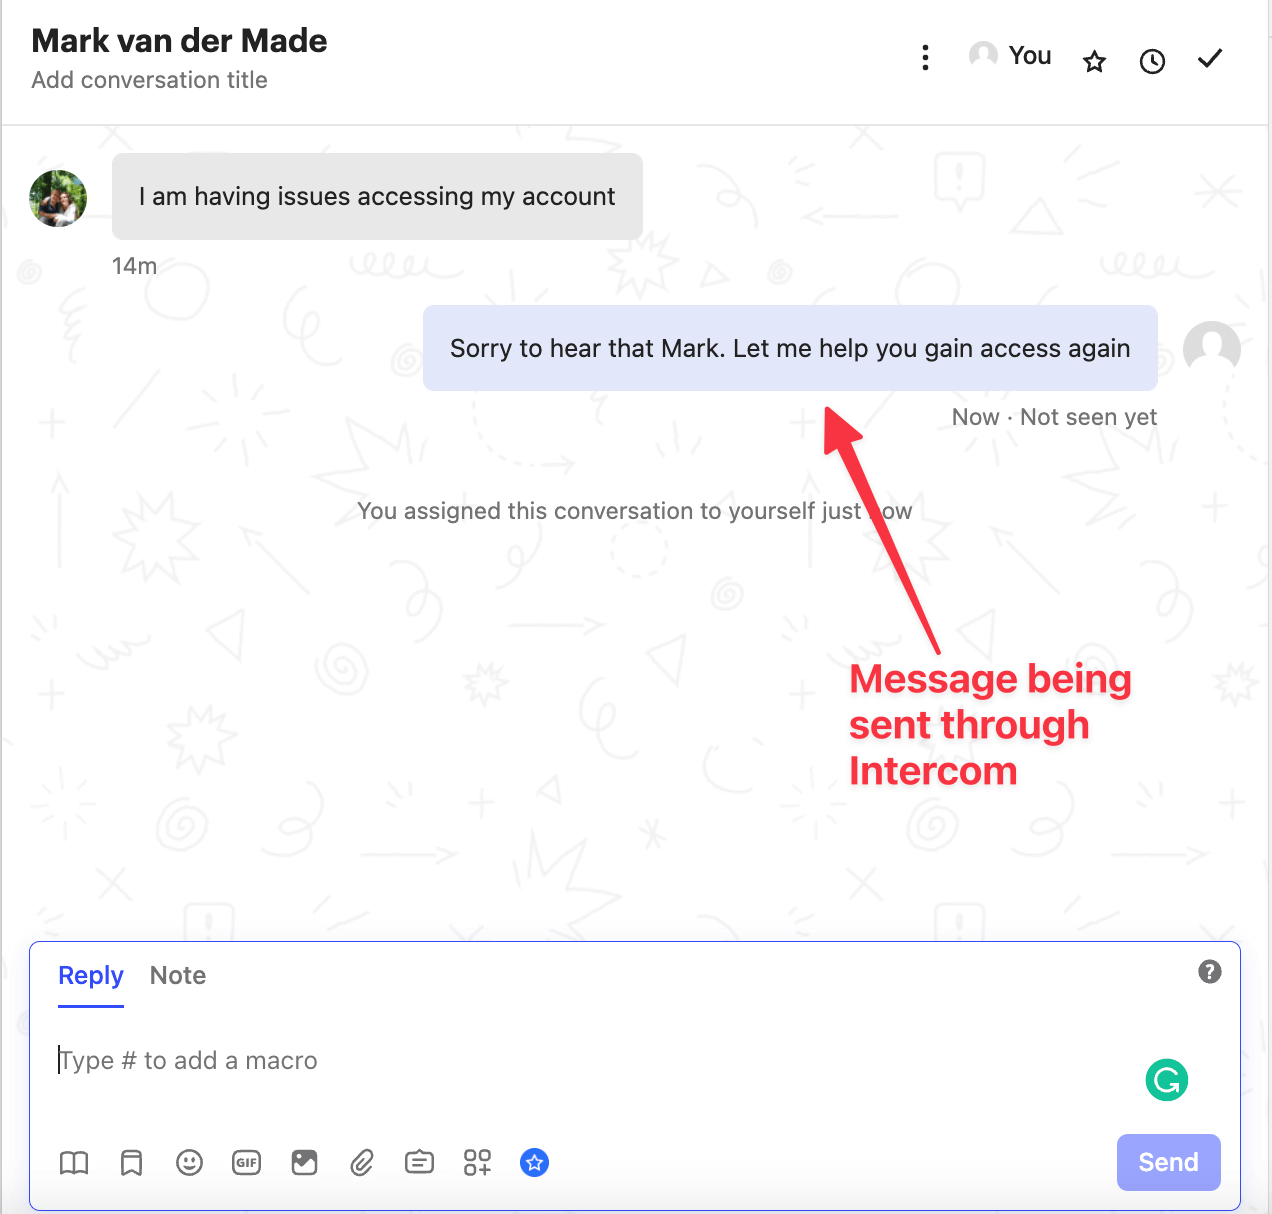
Now that the user is handed over to Intercom you can chat directly inside of the conversation. This conversation will be synced between the live chat inbox inside of Intercom, UChat and in this case the Messenger conversation of the user.
This means that the user can contact your business through any available channel you have set up and does not ever need to leave it, while you manage all the live chat support through Intercom.

And the user is receiving that same message inside of their Messenger conversation with your business;

As you can see the user is interacting with your live agent on Messenger, while your live agent is inside his Intercom interface. This provides a seamless experience for your customer.
This works on any channel you have chatbots in, and it basically will create your own unified inbox directly inside of Intercom.
UChat is currently supporting 11 channels and still counting.
How to enable the chatbot
When live support has finished you can easily enable the chatbot in UChat again.
Just press the close conversation icon at the top of your Intercom conversation.
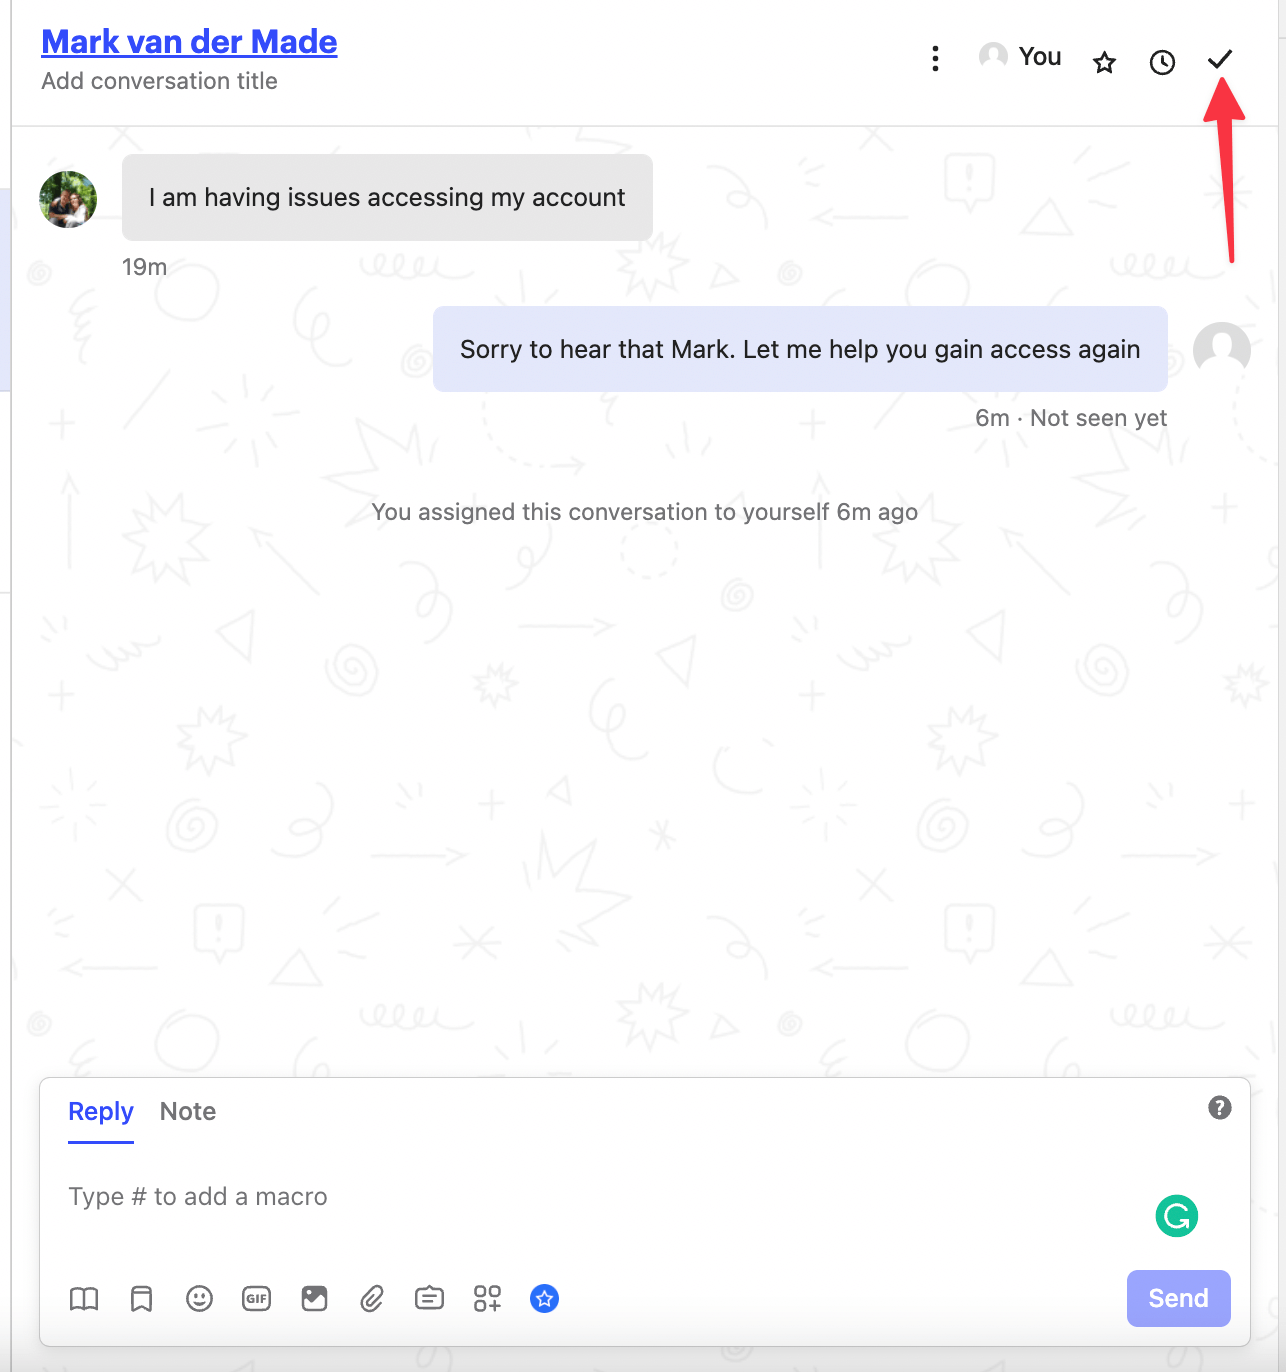
Once done the chatbot will take over again.
Full video walkthrough
If you rather watch the video walkthrough then take a look at the video below.

