
Supercharge Your Chatbot with ChatGPT's AI-Generated conversations
Welcome to an exciting new world of chatbot creation! Today, we're thrilled to share with you an innovative feature that will revolutionize the way you build ...

Partager cet article
AI is the most cost-effective as well as a time-sufficient way to train your chatbot to respond to your (potential) customers' questions.
It will reduce your support tickets greatly and this in turn lets you spend your resources on other parts of your business.
So how do you create such automation inside of your chatbot?
Make change here
You can do this by implementing Dialogflow.
To make this easier and help you get started we have created a customer support agent inside of Dialogflow for you, as well as a template for your chatbot.
Once downloaded you only have to import the training agent to your own Dialogflow account, connect it to your UChat workspace and you are all set to go :)
Of course, we will walk you through it step by step, so let's get started!
We prepared a full video walkthrough of everything you need to know on how to get started with the template and the Dialogflow agent.
You can watch the video below. If you rather want to read the step-by-step guide, then we have that prepared for you as well below the video.
First thing you will need to do is to import the training agent we prepared for you to your own account.
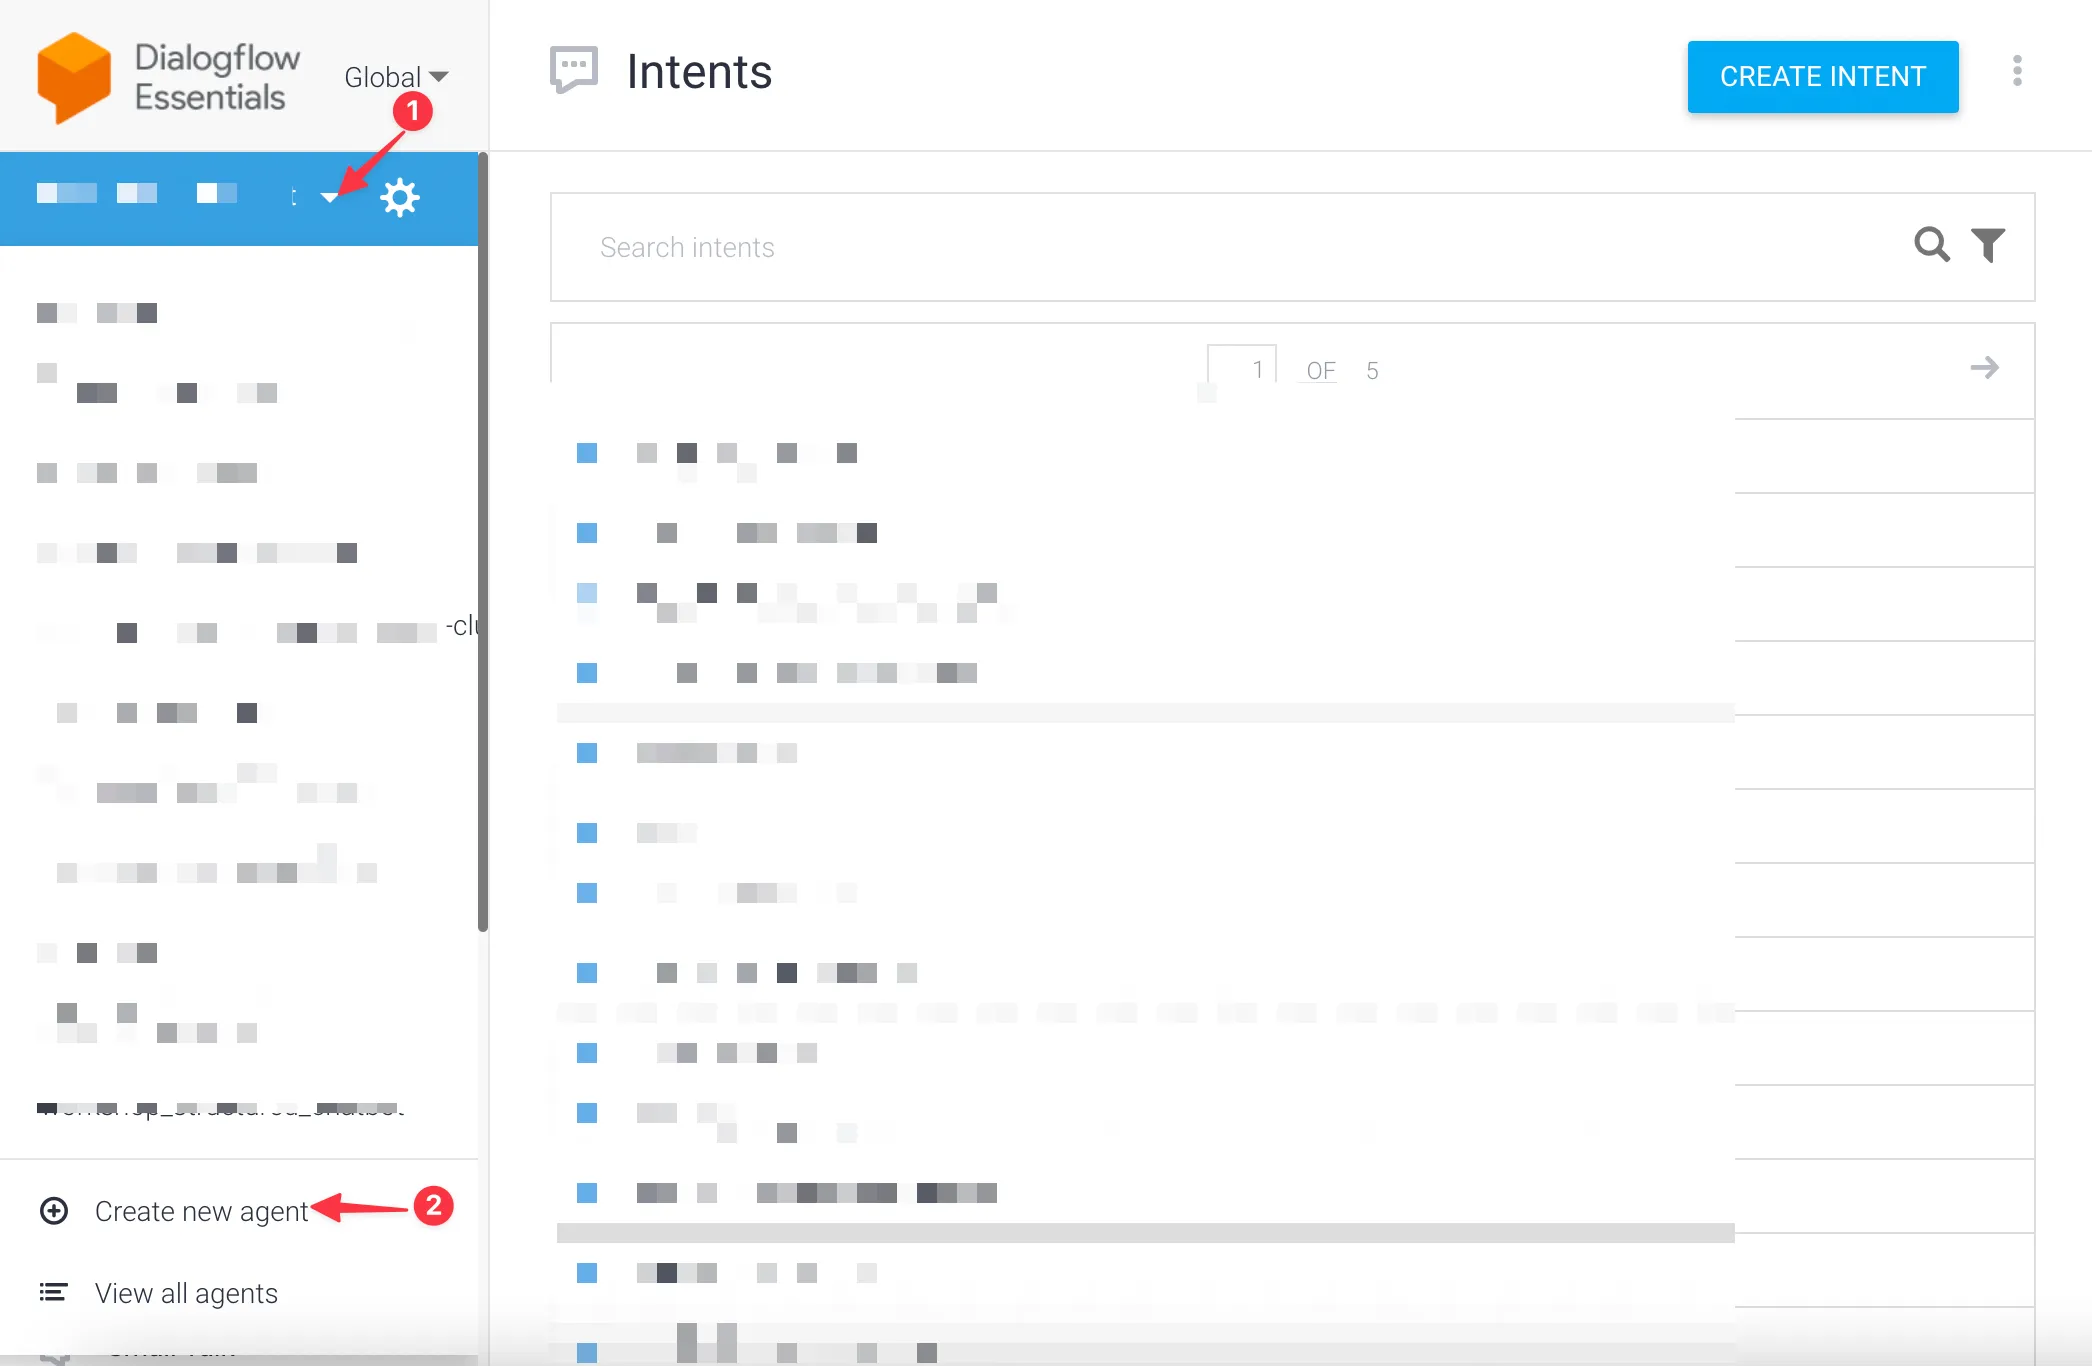
Once you have logged into your Dialogflow account you will come to your dashboard overview.
From here create your own training agent if you did not do so already.
Just press the dropdown, then select create new agent
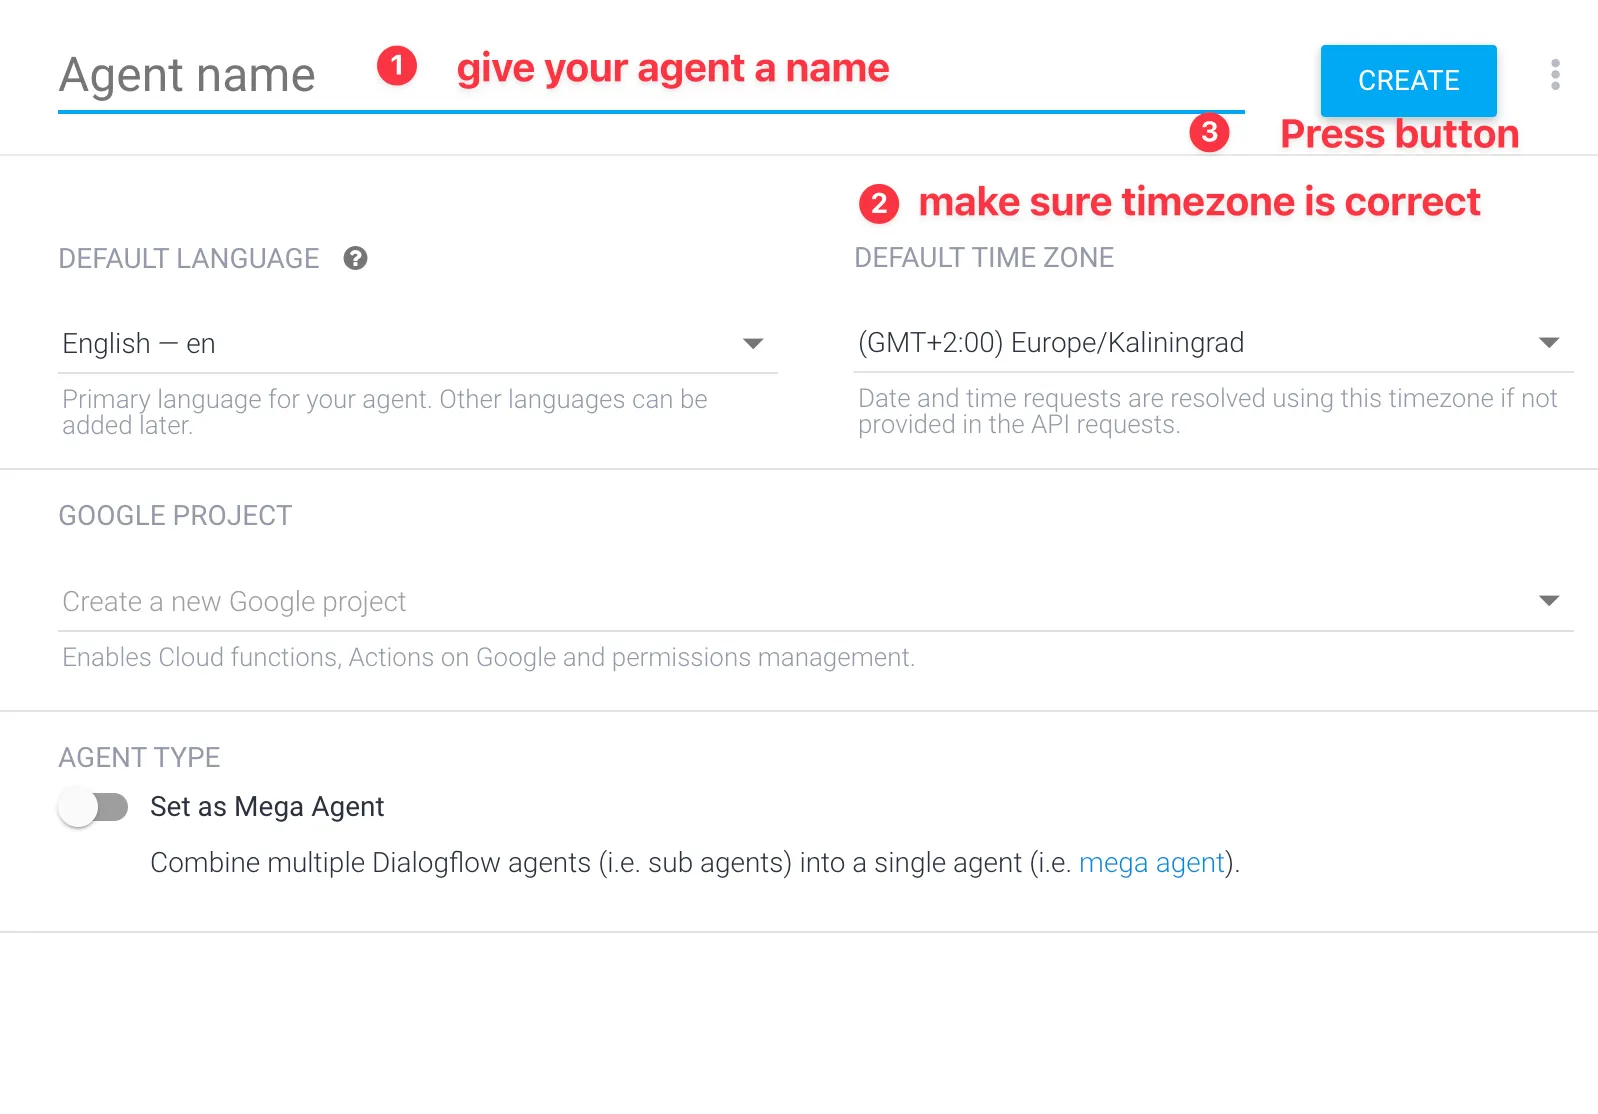
Once pressed a new window will open up where you will be able to give your agent a name, select the correct timezone and then press the button Create.
Now that you have created your agent you can go to the gear icon next to your agent name, then go to Export and Import.
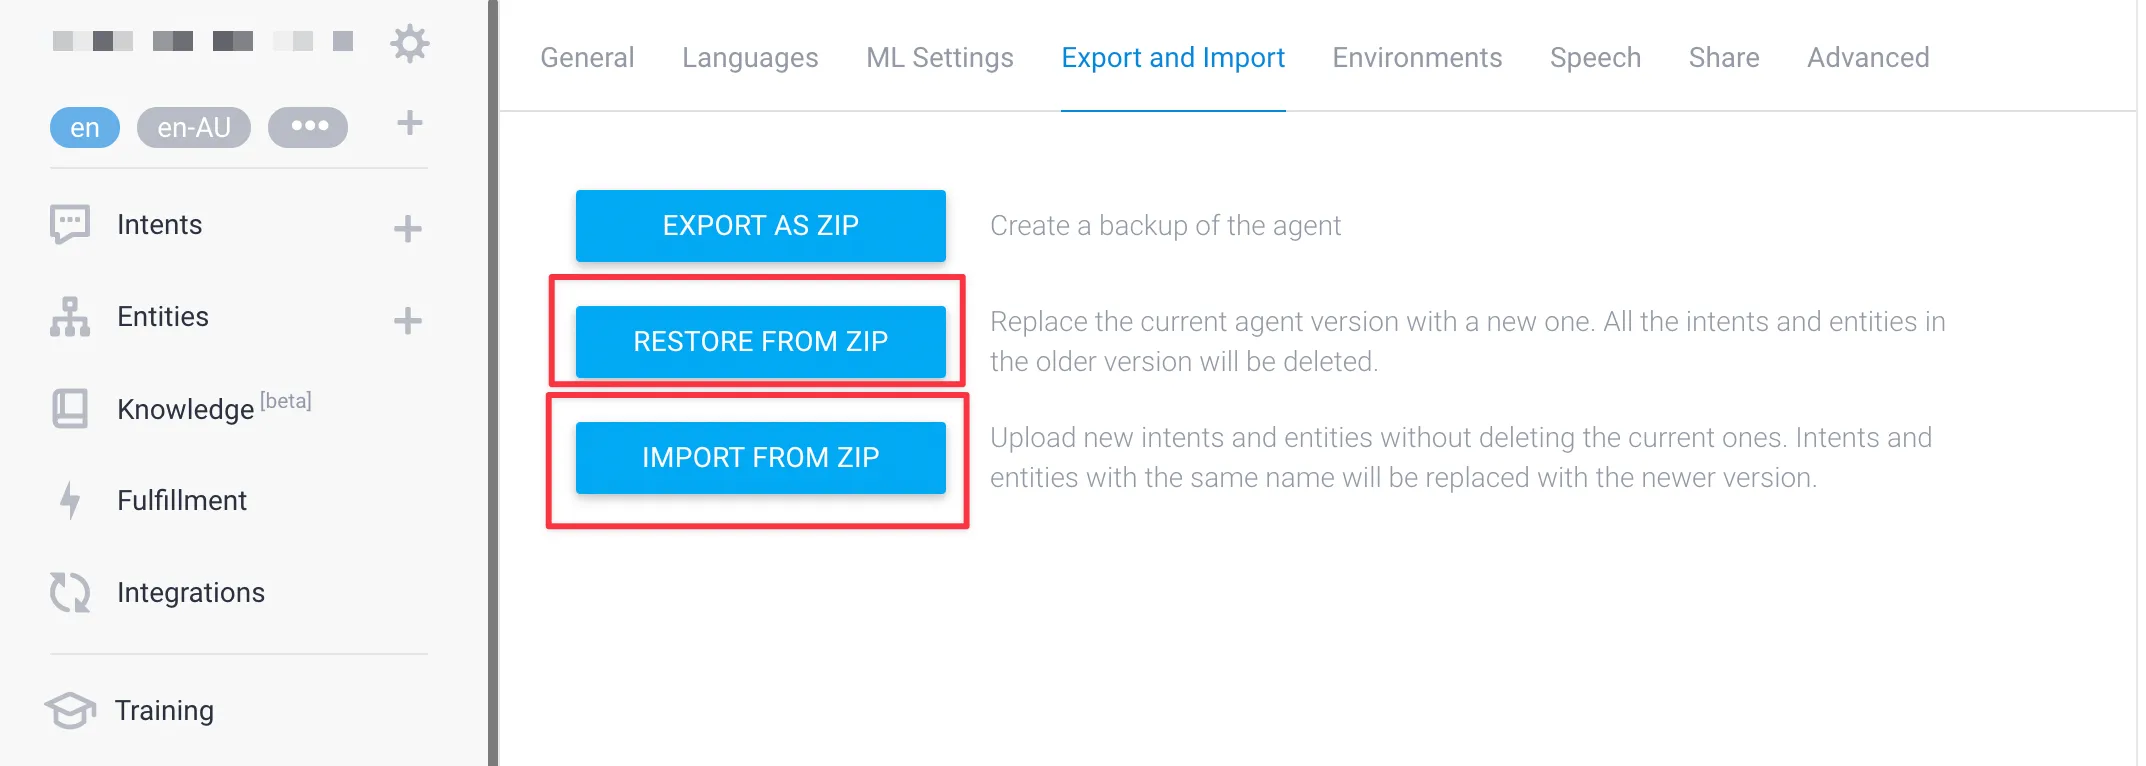
From here you will have two options:
Restore from ZIP. You can use this if you do not have any intents inside of your current training agent besides the default and want to override them with the prebuilt agent.
Import from ZIP. this means you can import the prebuilt agent alongside any intents and entities you might have set up.
You can choose the one that matches your preferences.
Once pressing the option of your choice, you will get to upload the ZIP file you downloaded from us. It will just take a few seconds to import those intents in.
Once done it would look something like this;
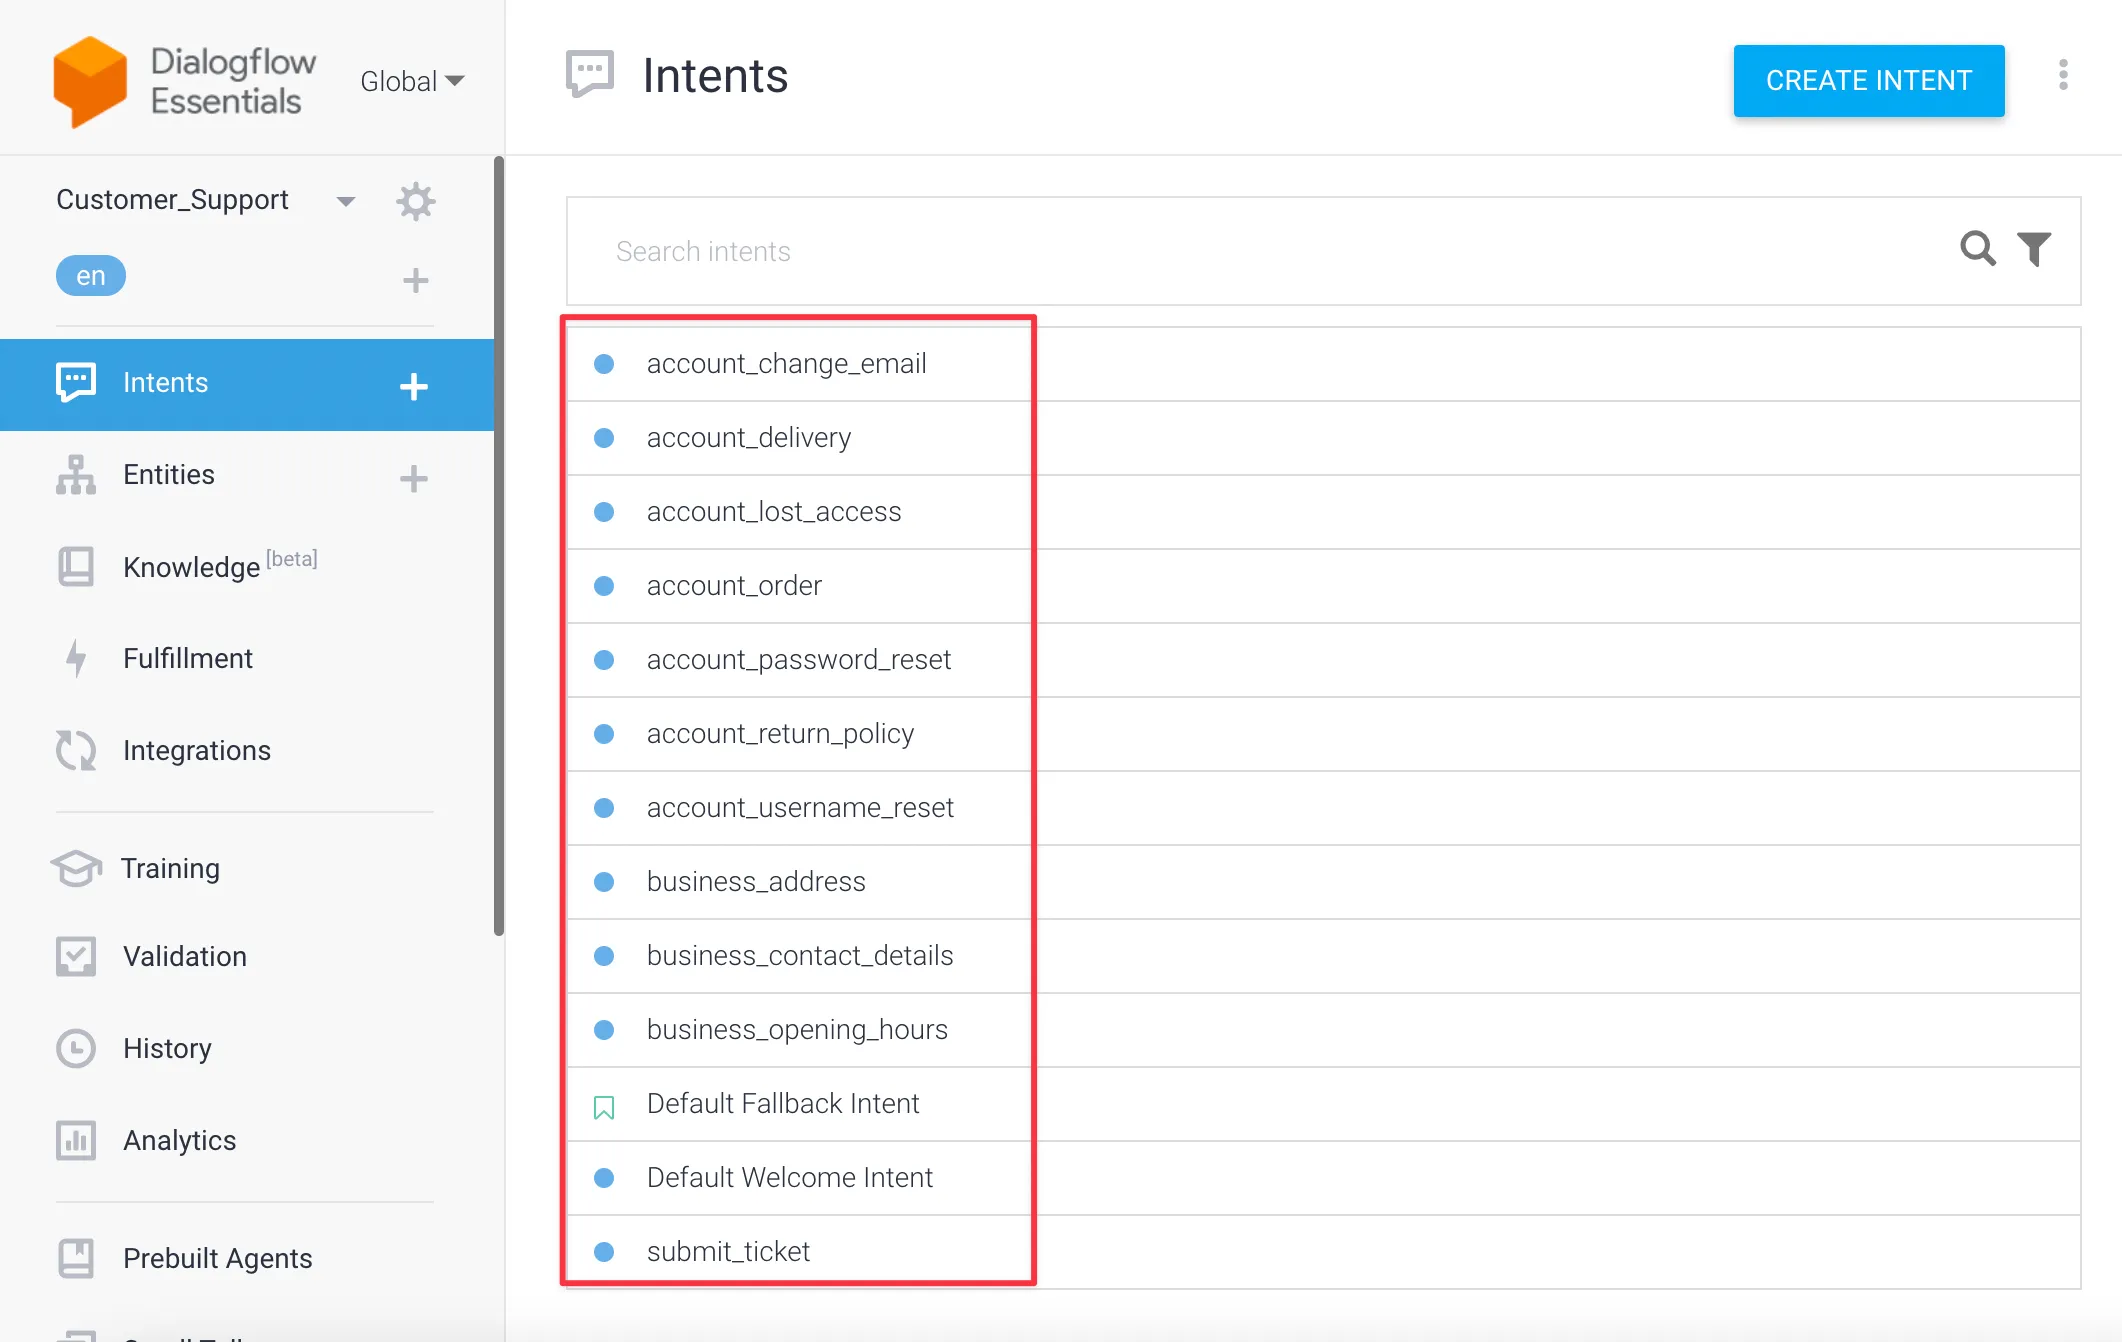
You can press any of the intents to see its content.
Once you pressed one of the intents you can see all of its contents.
Two sections will have been filled in;
Training Phrases. These will allow Dialogflow to understand that this intent needs to be triggered soon as the user says anything like in the phrases provided. Try to create 5-10 different variations for better results.
Responses. Where you will be able to create a reply whenever this intent has been triggered.
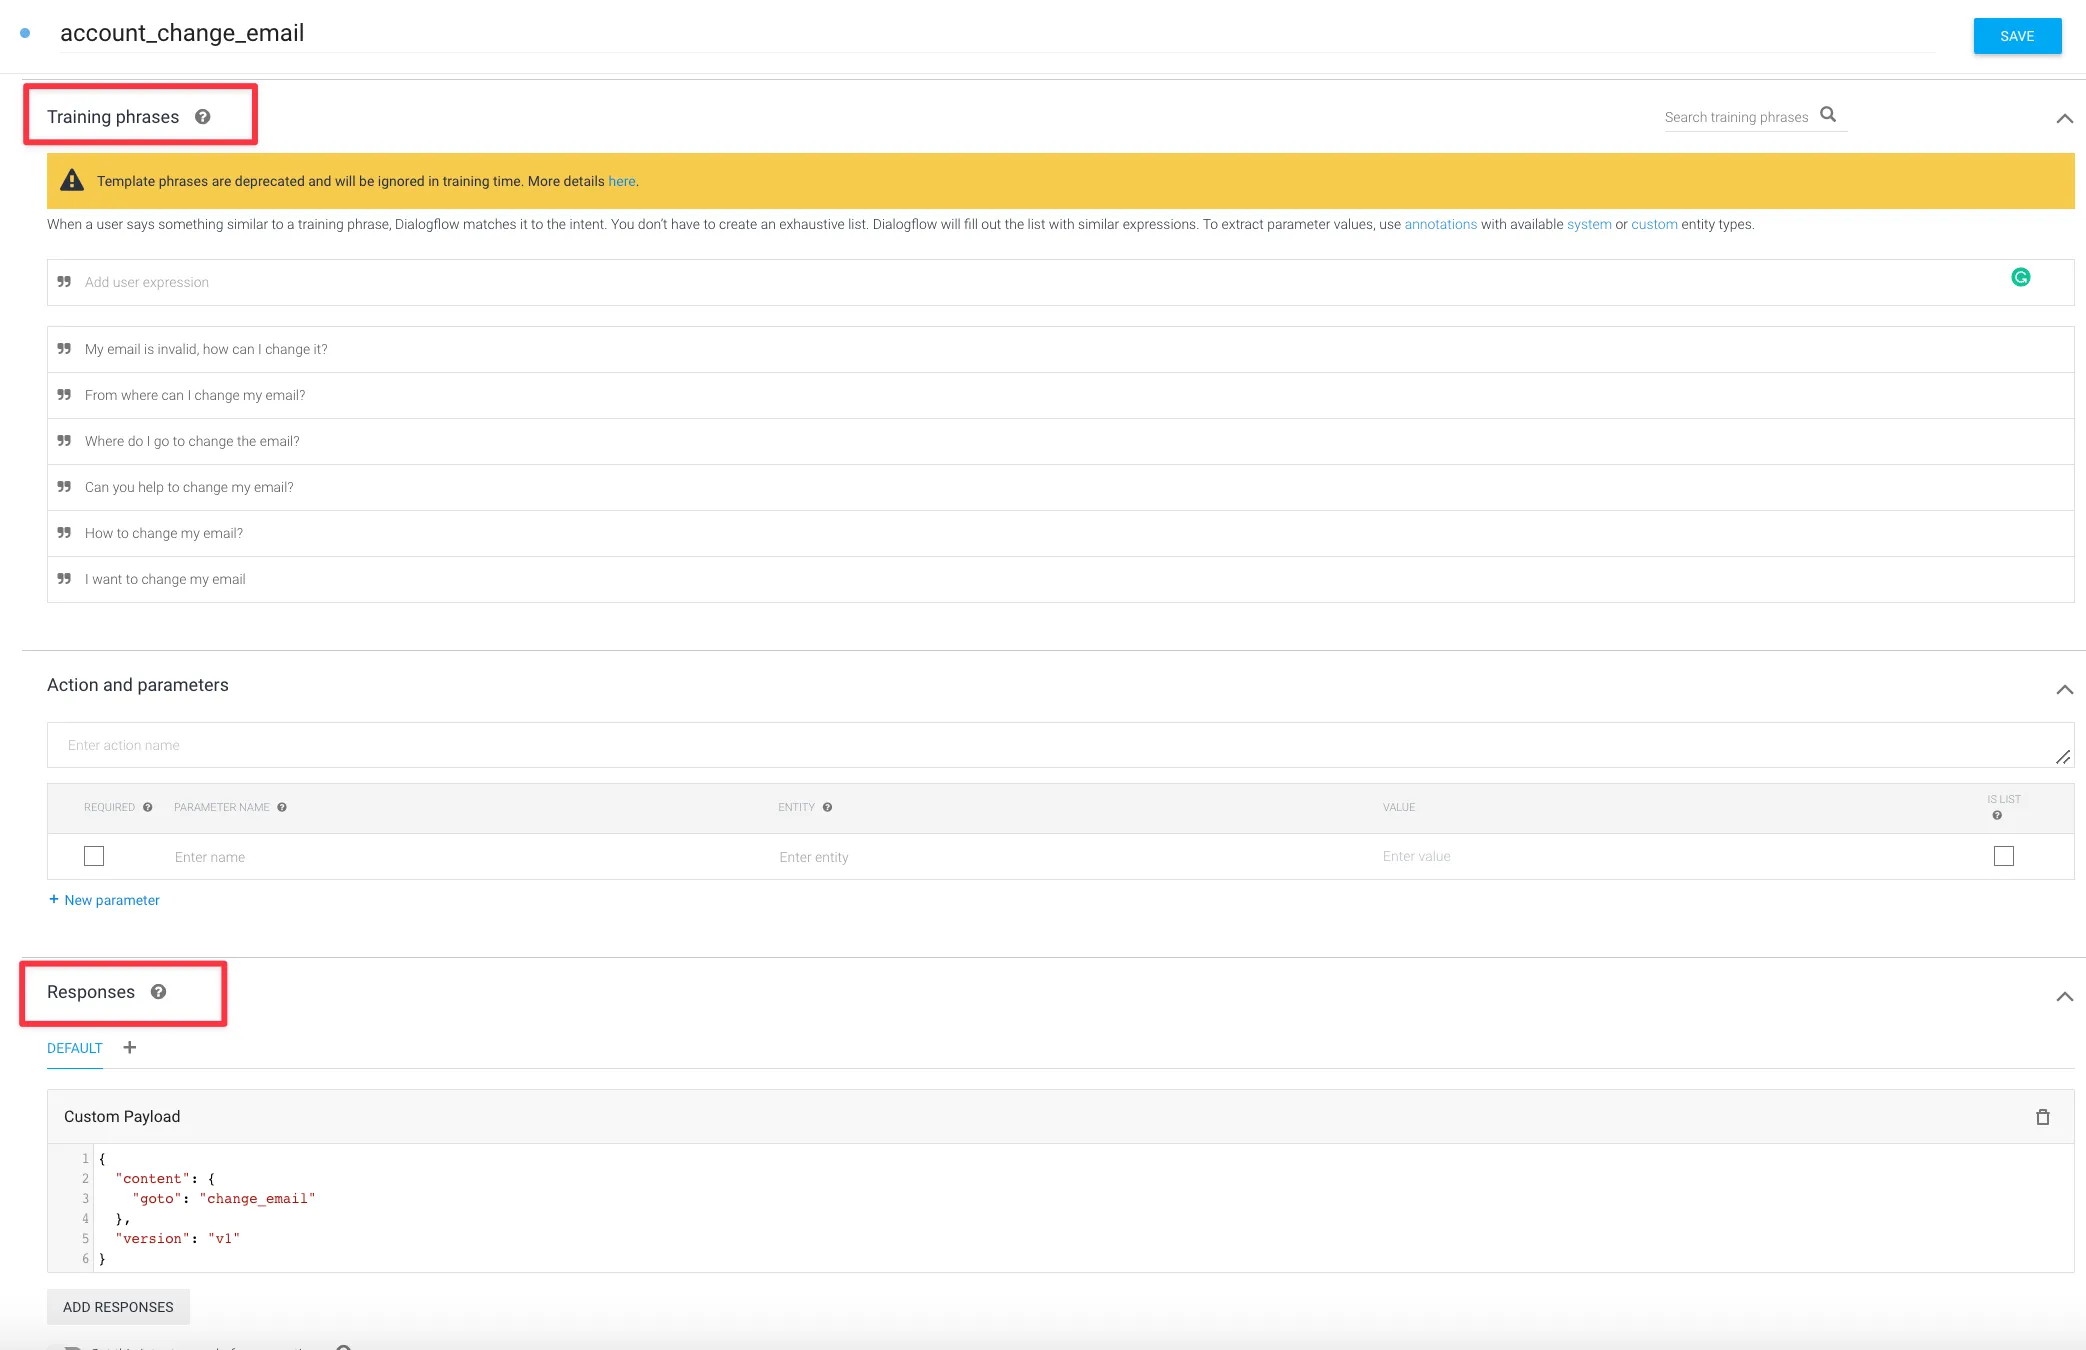
In the responses section, we are using a custom payload type response, which allows us to redirect the user to a specific block in your flow.
The custom payload format is as follows:
{
  "content": {
    "goto": "blockname"
  },
  "version": "v1"
}
The section go to will define where you will take the user. So this value needs to be exactly the same name as you give your block inside your flow.
So if we take a look at the first intent example you will see that the block name is the same as the goto value in the custom payload.
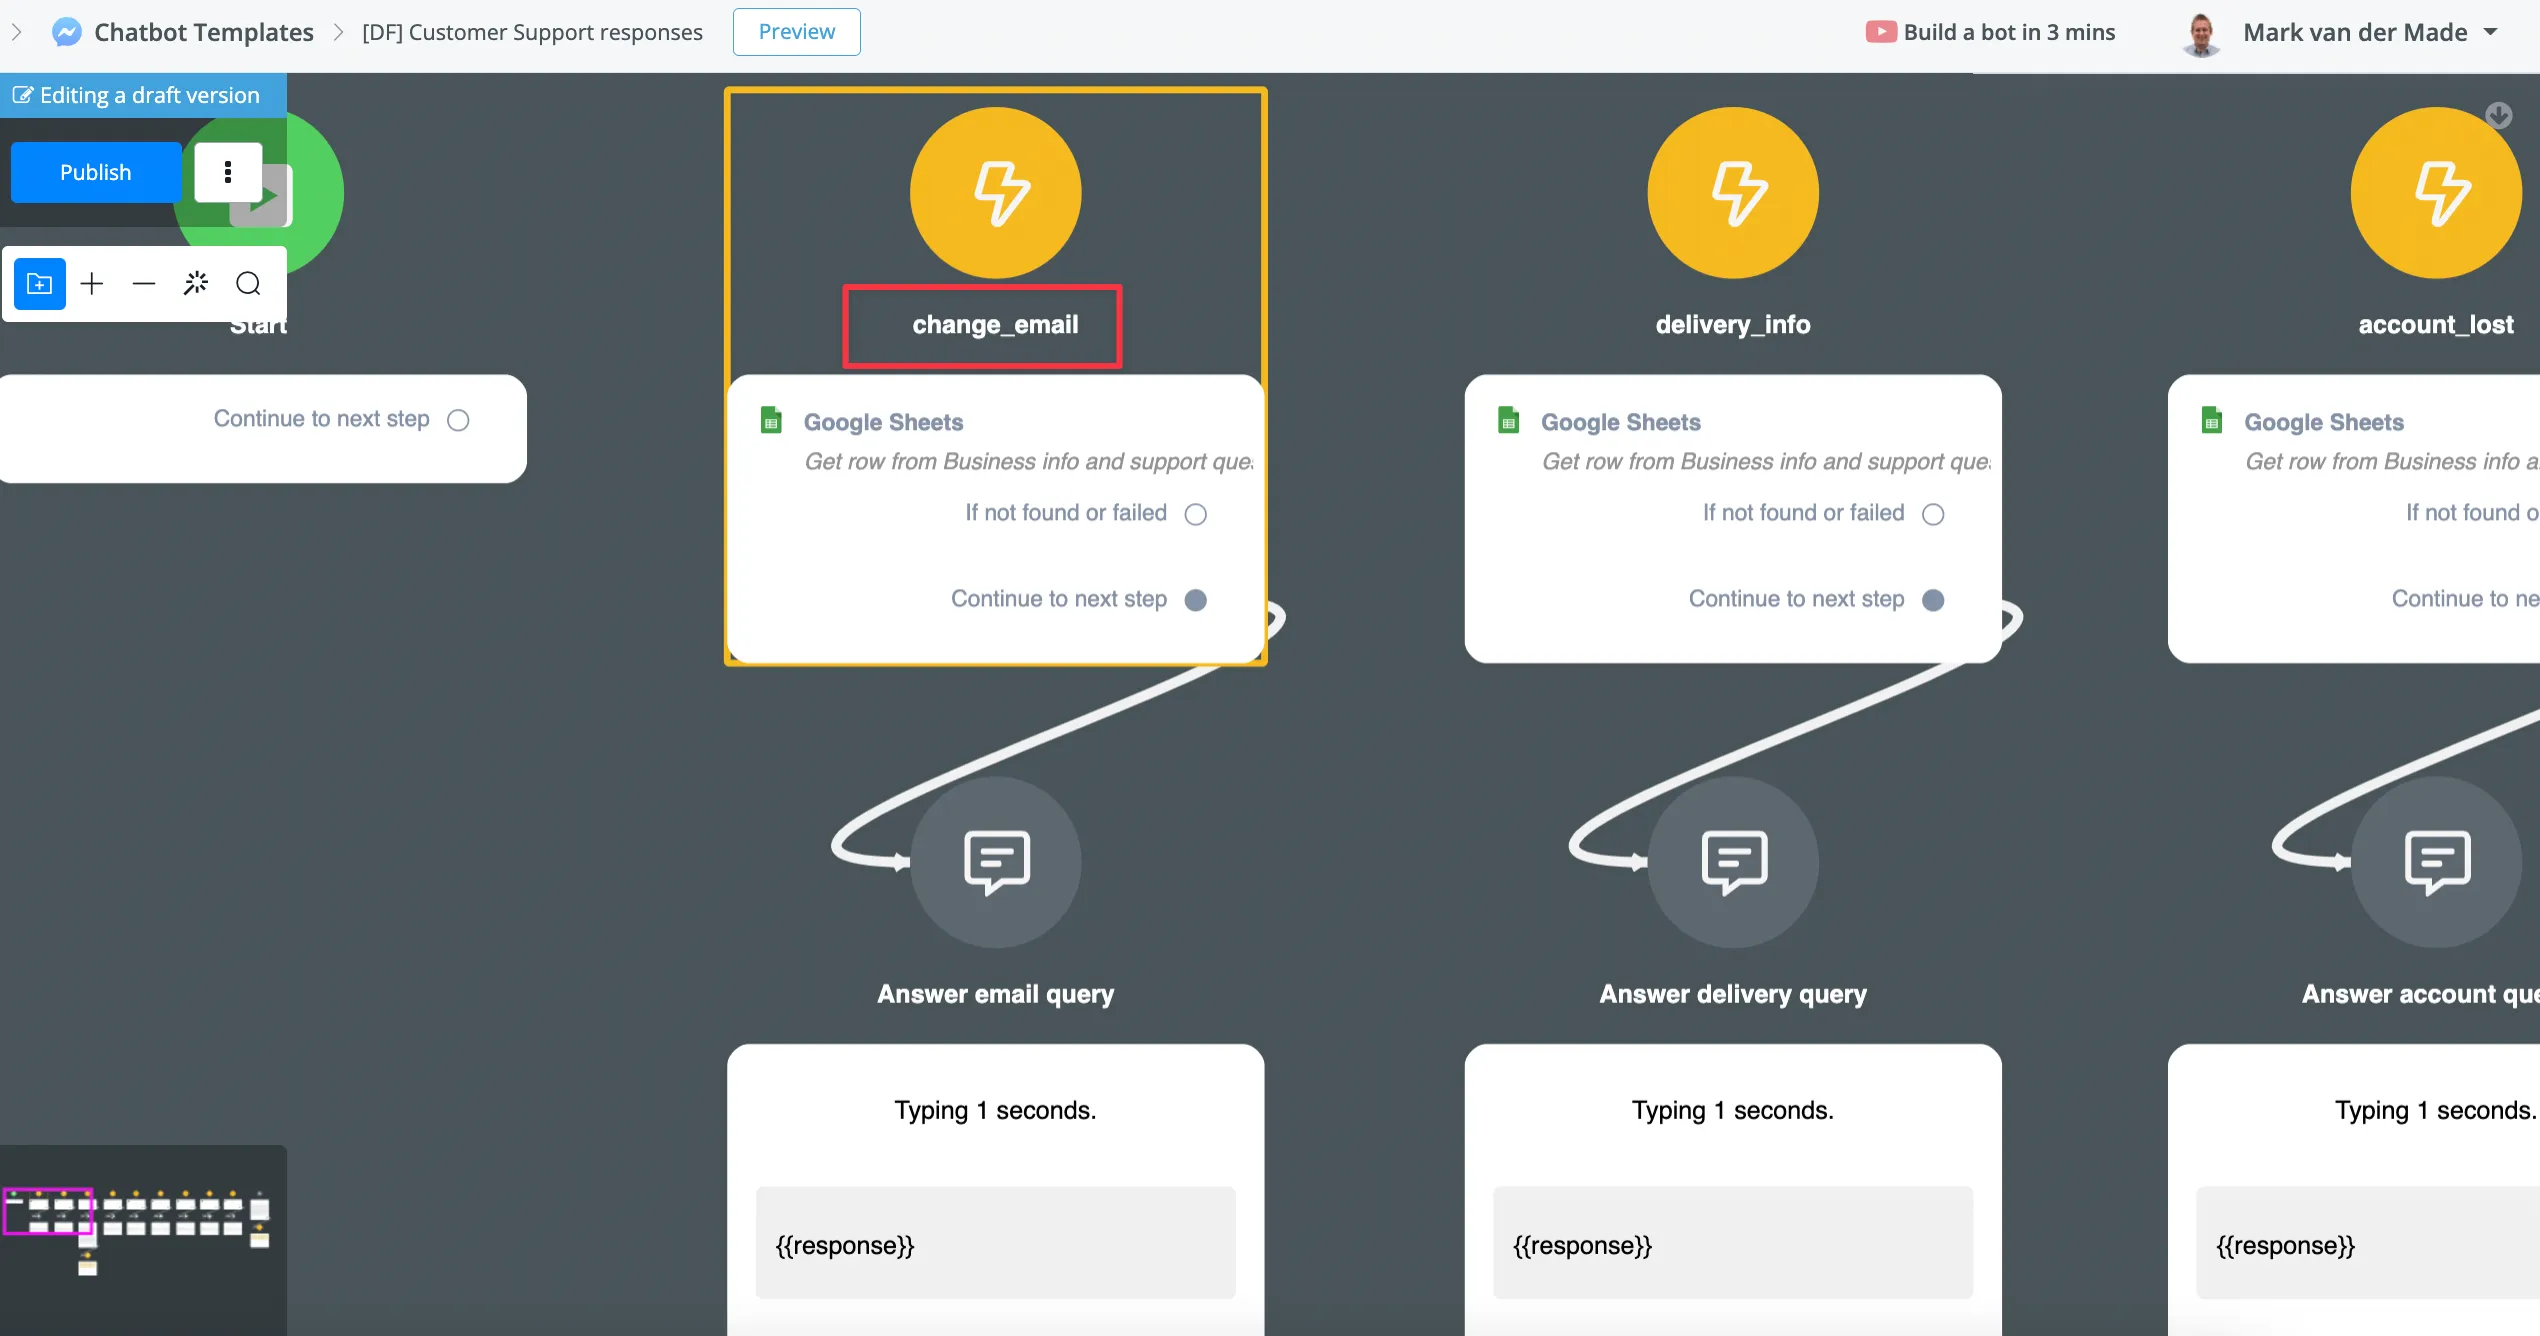
The template you installed onto your chatbot works alongside a google sheet integration. This sheet you also have copied over along with the template and the Dialogflow agent.
The Google Sheet will contain all the customer support questions in this case but if you rather write the answers directly inside of the flow itself you can do so as well of course.
The way it works is that the Google Sheet integration will search for the correct answer inside the spreadsheet.
Inside the action block select the google sheet integration, then select get row by value. From here set everything up like in the image below;

Once done press save in the bottom right corner and you are good to go.
Just connect the action block to a text message block. From here just insert the user field you saved the answer from the Google Sheets to.

You can repeat the process for all the other action blocks inside the flow.
Just replace the sheet with your copy, select the correct worksheet, then adjust the filter to match the lookup.

We hope this template will give you a good headstart and from this, you can expand your automated customer support to greatly reduce the tickets coming in.
If you have any questions or issues we are happy to help you answer or solve them.
If you want to grab the template, the Dialogflow response agent and the copy of the Google Sheets, press the button below
Partager cet article

Welcome to an exciting new world of chatbot creation! Today, we're thrilled to share with you an innovative feature that will revolutionize the way you build ...
The power of artificial intelligence has revolutionized the way businesses interact with their customers. UChat has taken one step above and beyond to introduce...

Have you ever thought about using AI-generated images for your content, be it blog articles or social media posts? In this blog post, we'll discuss how you can...